
Now you can deploy a local Kubernetes cluster easier than even with Docker Desktop. If you have docker version 18.06.0ce or later, it comes bundled with Kubernetes. In this post, I’ll walk you through getting your Docker Desktop Kubernetes cluster up and running. With this cluster, you can run kubectl commands, deploy helm, the Kubernetes dashboard, or any other facility that can run in Kubernetes. You can even setup Docker Compose to deploy pods to Kubernetes directly from a compose file by using docker stack. I’ll be using a mac to demonstrate these features. Let’s get started.
Install docker desktop if you have not done so.
Kubernetes Setup
After docker is installed, pull up the preferences and click on the Kubernetes tab. Enable Kubernetes by selecting the checkbox, also select Kubernetes as the default orchestrator. We’ll be using the default orchestrator later in the post for the docker stack command. Avoid clicking on the “Show system containers” checkbox. When you enable that, all of the Kubernetes “system” containers will show up in your docker ps commands. Only check this if you fully understand the consequences, otherwise it’s unnecessary.
Hit the “apply” button and Kubernetes will download if this is the first time you’ve enable it, otherwise it will just begin to start up. You’ll see an orange indicator while Kubernetes is starting. You’ll see a green indicator, like the docker status indicator, when the cluster is up and running.

kubectl
Now that kubernetes is running, you can access your cluster with kubectl. Make sure kubectl is set to the docker-for-desktop context (this should happen automatically).
$ kubectl config use-context docker-for-desktop
Switched to context "docker-for-desktop".
We’re in the right context, let’s make sure the cluster is up and healthy from the command line.
$ kubectl get cs
NAME                 STATUS    MESSAGE              ERROR
controller-manager   Healthy   ok
scheduler            Healthy   ok
etcd-0               Healthy   {"health": "true"}
We now have the Docker Desktop Kubernetes cluster up and running. From here, we can install the dashboard. This is an optional step, you can skip this section if you don’t care about the kube GUI.
$ kubectl apply -f https://raw.githubusercontent.com/kubernetes/dashboard/master/src/deploy/recommended/kubernetes-dashboard.yaml
secret "kubernetes-dashboard-certs" created
serviceaccount "kubernetes-dashboard" created
role.rbac.authorization.k8s.io "kubernetes-dashboard-minimal" created
rolebinding.rbac.authorization.k8s.io "kubernetes-dashboard-minimal" created
deployment.apps "kubernetes-dashboard" created
service "kubernetes-dashboard" created
Open a new terminal and start your kube proxy to access the dashboard.
To learn how to access the dashboard without a proxy, see the User Guide on Accessing the Dashboard.
$ kubectl proxy
Starting to serve on 127.0.0.1:8001
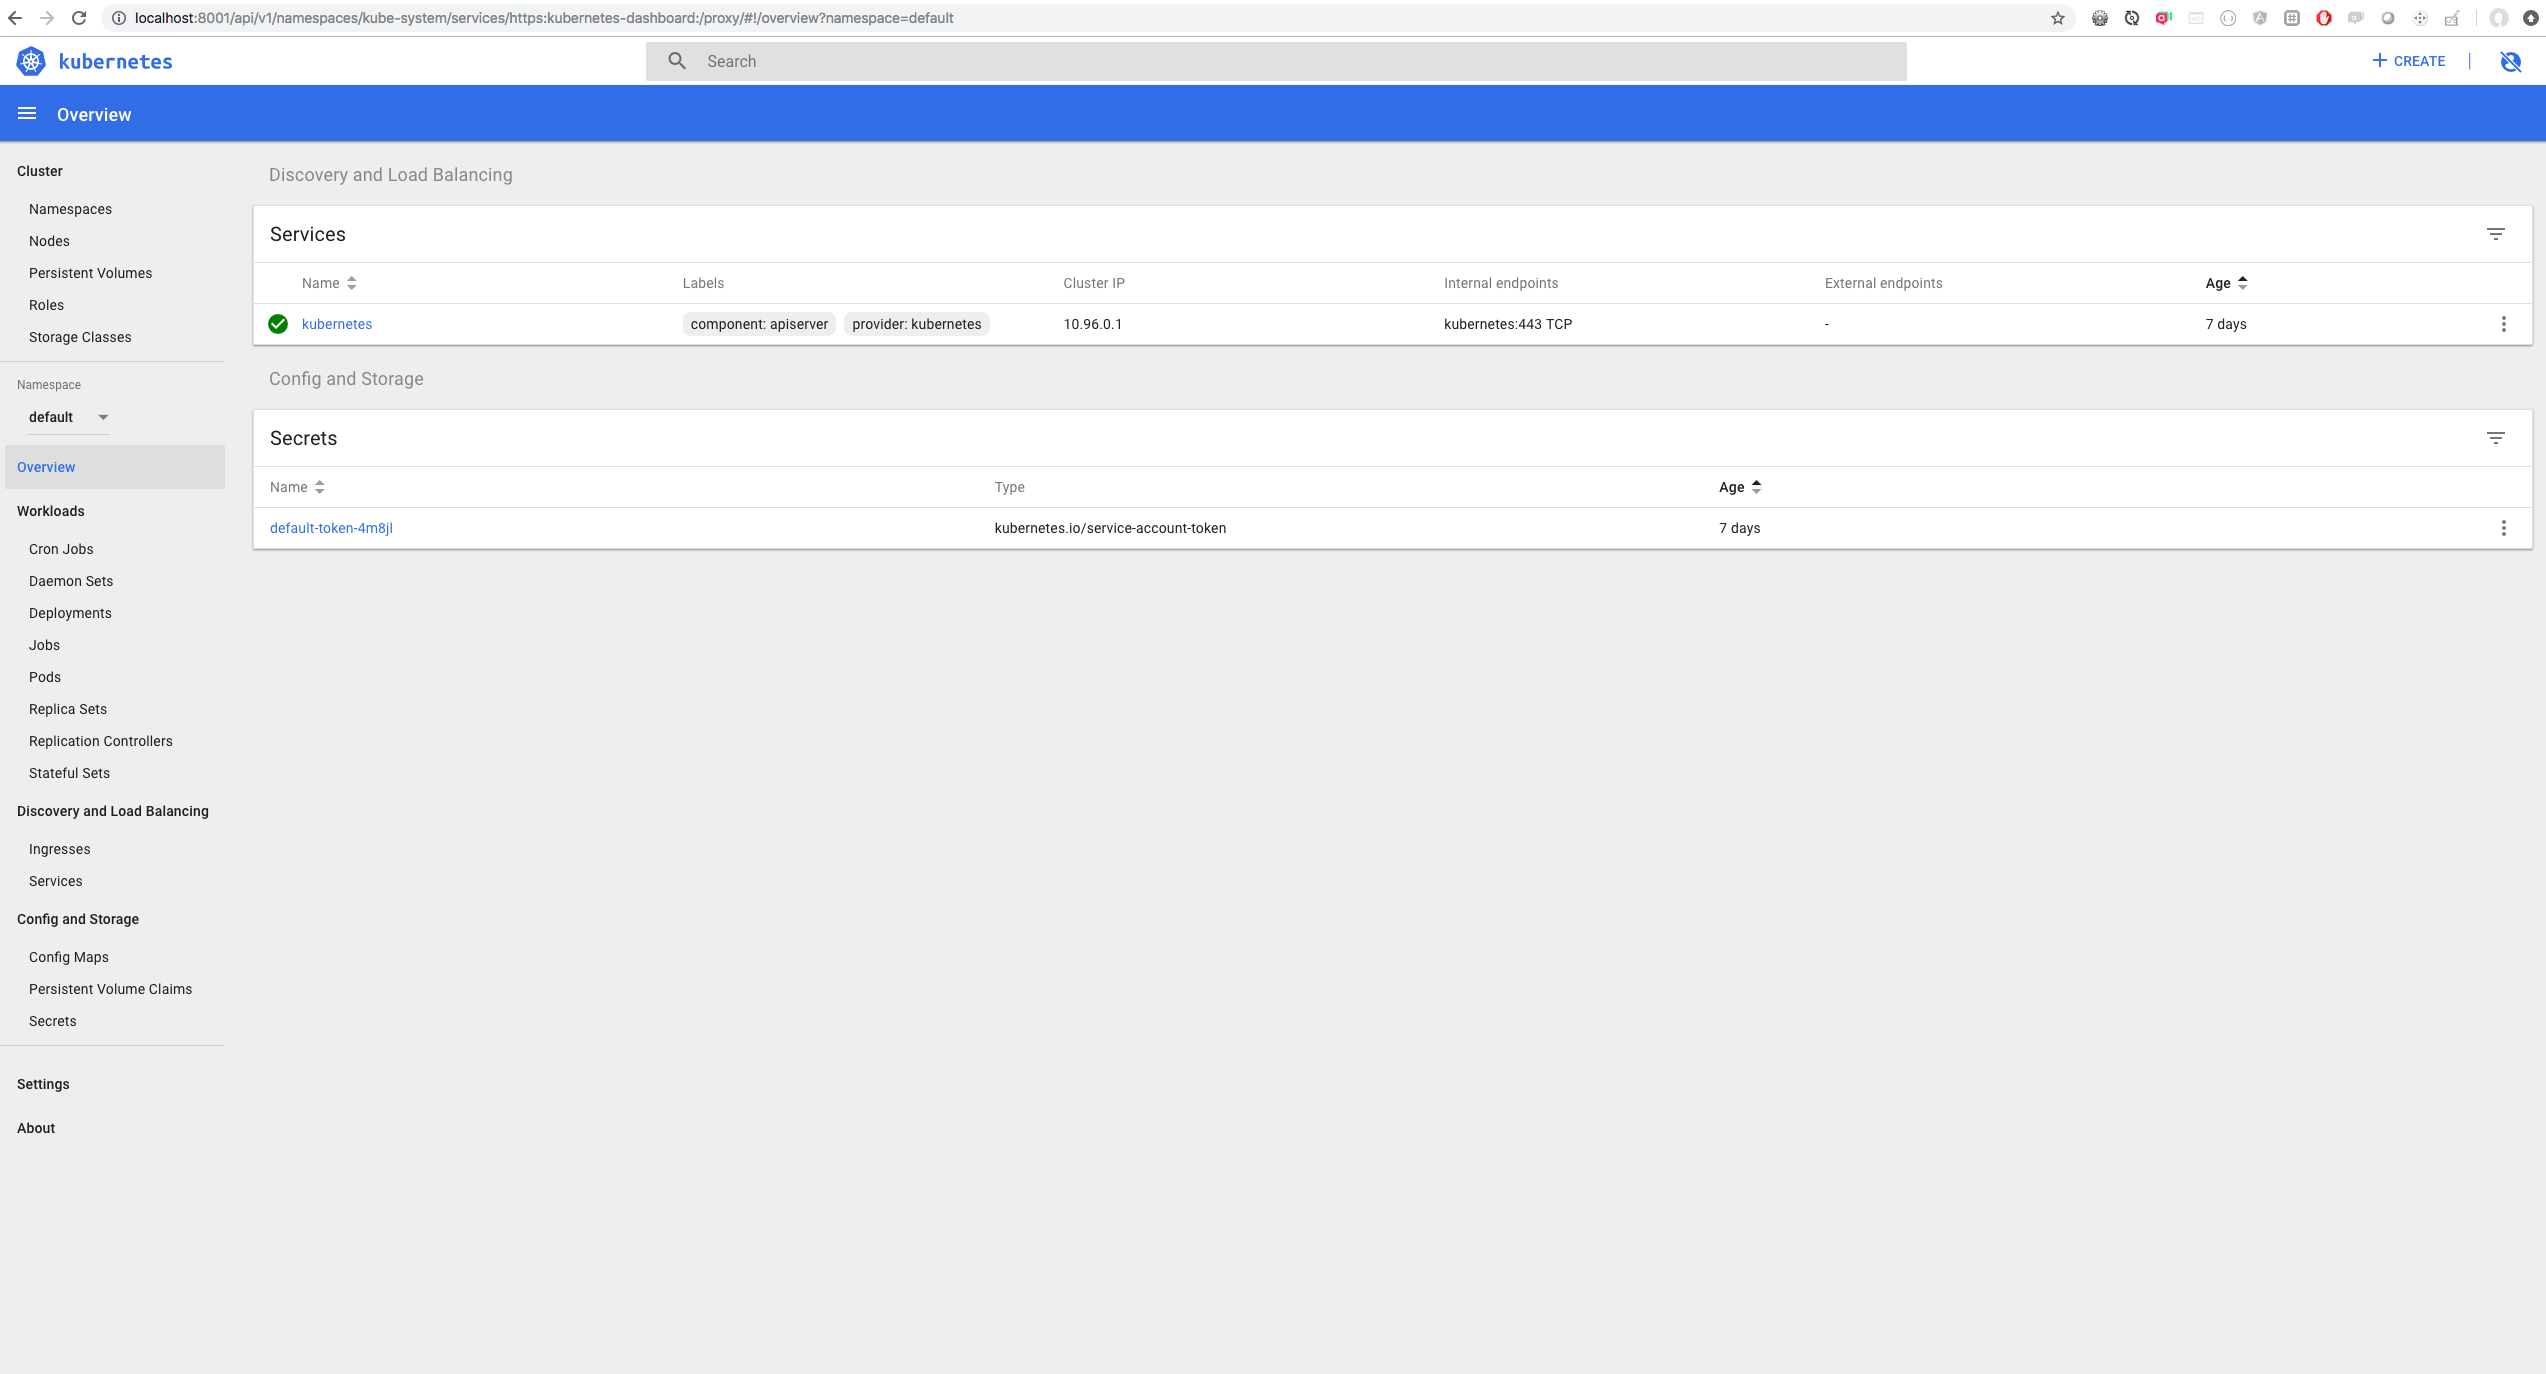
Now you can access the dashboard in your web browser. Skip the authentication and you will go directly to the dashboard home screen.
http://localhost:8001/api/v1/namespaces/kube-system/services/https:kubernetes-dashboard:/proxy/

Congratulations! Your cluster is up and the kubernetes dashboard is installed. From here, you can deploy pods and install other facilities in your cluster.
docker stack
You can use docker stack and deploy docker compose files to Kubernetes. For this to work, Kubernetes must be selected as your default orchestrator in your docker preferences (this was done in a previous step). I’ll show you a simple example of deploying nginx via a compose file to your cluster.
Create a docker-compose.yaml file with the following contents.
version: '3'

services:
  nginx:
    image: nginx
    ports:
      - "8080:80"
The above configuration will run an nginx on port 8080 of your local machine. Deploy it with the following docker stack command.
$ docker stack deploy -c docker-compose.yaml nginx
Waiting for the stack to be stable and running...
ngnix: Ready        [pod status: 1/1 ready, 0/1 pending, 0/1 failed]

Stack nginx is stable and running
Check your pods, nginx should be running in your cluster.
$ kubectl get po
NAME                   READY     STATUS    RESTARTS   AGE
nginx-7fd464bd46-vttkq   1/1       Running   0          4m
View the nginx landing page in your browser on the port you configured:

Cleanup
Do a listing to see the docker stack that was created.
$ docker stack ls
NAME                SERVICES            ORCHESTRATOR        NAMESPACE
nginx
Remove the stack by name.
$ docker stack rm nginx
Removing stack: nginx
You should no longer have a kubernetes pod running nginx.
$ kubectl get po
No resources found.
What about Minikube?
Both minikube and Docker Desktop allow you to run single node clusters in a similar way. Minikube, however, gives you the ability to start specific versions of Kubernetes where as docker ships with a non configurable version (now v1.10.3). If you are new to Kubernetes and want to quickly get something up to test, Docker Desktop is a great choice. If you’re an advanced user, and you need to test against multiple versions of Kubernetes, minikube is the better option.